Eve of the Arrival of Baby Chicks
One fateful day, my son, AB, came home from school with a paper from our local 4-H. It was entitled "Chick Chain". I took a few minutes to read about the program. AB said that he wanted to do it. On that particular day, our captive animal population included a bearded dragon, two turtles, one dog, and multiple fish. I regularly care for the CAPs. I really didn't want to triple our CAPs. I want my children to respect all living things, and I want them to be responsible for their CAPs. I have many wants.
We live in a small Southern town, however, we do not live on a farm. I've never raised livestock or flocking animals of any type.
That evening when my spouse arrived home from work, I handed him the aforementioned paper. After quickly scanning the paper, he said, "ok". Ok, what? No... The appropriate answer was no.
At one point in the past, I may have wanted to raise chickens and to be earthy and such, but I have come to the realization that I may not have time for that right now. I may have my kitchen decorated in roosters, but I'm not sure what to do with fowl of the flesh and blood variety. Ok,so with much hesitation, we are doing this.
We pay the $50 for the program. We attend an orientation. Many weeks go by.
Tomorrow it "C" Day. Chickies Day. Eighteen of them to be exact. They are to be picked up in a shoe box at our local Extension office. Like any expectant mother on the day before her due date, I have the nursery prepared. So, finally, there it is. The point of this post. I had to create a brooder for the baby chicks first few weeks of life to keep them safe and warm. This is what I came up with.
.JPG) |
I purchased a small roll of hardware cloth. I
used wire cutters to cut the hardware cloth to an
appropriate size for the lid. Then, I used a
permanent marker to mark in the corner
one square over from each edge. |
.JPG) |
Using a permanent marker and the edge of a square,
I drew lines to each mark I made earlier in the corners. |
.JPG) |
I gently used a box cutter to go over the lines. This
was a rather tedious task. I applied gentle pressure
as I went over it each time. Eventually, I cut through
the plastic. As much as I would like to have rushed
through this step, patience paid off. |
.JPG) |
Using the hardware cloth as my guide, I drilled
holes in the corners and midway on each side. |
 |
| I used #10-24x3/4 inch machine round combo with nuts and #10 finish washers. |
.JPG) |
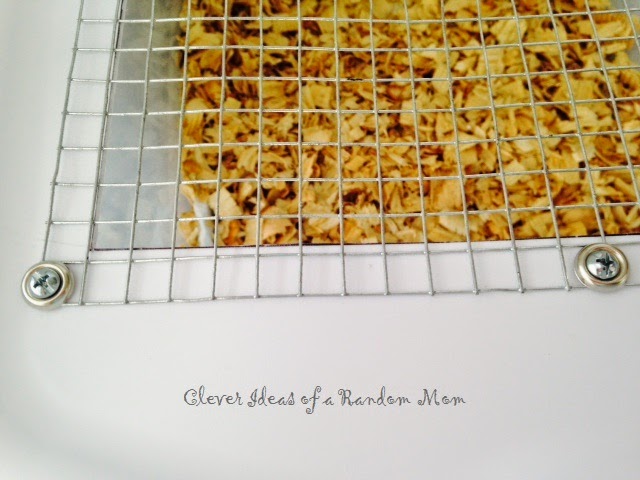
I laid the hardware cloth on top of the lid, aligning the corners
with the holes. Then, I put the bolt through the washer, in the corner
of the hardware cloth, through the hole, and attached the nut on
the underside. I will check the nuts daily and tighten as needed. |
.JPG) |
| Closeup of hardware cloth and bolts |
.JPG) |
| This is the completed setup, ready and waiting for the chickies. I wanted to try out the bulb, but this is not the actual fixture that we will be using. I may go with a smaller waterer, but the feed store was out of them. |

