Sunday, May 25, 2014

No Sew Costume for a Pow Wow Princess

Recently, our Cub Scout pack had our end of the school year awards banquet.  The theme was a Pow Wow.  We were fortunate to have an anthropologist who has studied the Native American culture lead us in the Pow Wow.  He allowed the children to assist him in setting up a lifesize tee pee.  We learned about various tribes. The Scouts and their siblings wore Native American style outfits.  It was a fantastic event!

I turned to the internet for inspiration on a design for LG's outfit.  I found this site http://blogilates.tumblr.com/post/9876043253/diy-pocahontas-costume-for-under-5-tutorial, and got a few ideas.

I purchased a Youth Large t-shirt at Hobby Lobby.

 I couldn't find the RIT dye, but I did find Tumble Dye.  

First, I cut off the hem at the bottom. Later, we used the hem as a belt to cinch the costume. Next, I cut off the sleeves at the angle shown in the original tutorial.

Then, I cut thin strips from the sleeves.

  Next, I cut fringe in the raw edge of the bottom of the shirt.

 Then, I cut small slits below the neck of the shirt. I looped the strips through the slits.

Longer strips were used in the middle and shorter ones were used toward to outside.  I tied them in a simple knot.

I prepared the floor by placing clean garbage bags on it.  I dampened the costume and wrung it out. Then, I put it on the trash bags. I applied the spray dye evenly over the garment. You could do it outside, also.

Next, I hung the costume in the kid's shower to dry overnight. In the morning, I put the costume in the dryer to heat set it. It turned out beautifully, but it was a little short, so, LG wore gym shorts under it. It is unlikely that I will wash the costume, so I don't know if the dye washes out.
LG, the Pow Wow Princess

LG wears a little girls 5/6 and the shirt was a youth large. 

Disclaimer: I have not been compensated in any way for mentioning the products and store listed in this post. Although the above mentioned website was used as inspiration, the completed design belongs to Clever Ideas of a Random Mom.


Tuesday, May 6, 2014

True Warrior

A dozen or more.
That is the number of times each day that I think to pick up the phone to call my mother. I don't actually do it, you see.  My mom lost her battle with Lupus just days before my 39th birthday. 
My mom was diagnosed 18 or so years ago.  I didn't realize that she was truly sick until 2006.  One Sunday afternoon, after eating lunch with our family, I noticed the rolled up sleeves of her white, linen tunic revealing her battered-looking arms.  They were so very, very thin, and bruised. They were shades of black, purple and blue.  I asked her what happened. She replied, “nothing”.  Really?  That began my lesson into the horrors of autoimmune disease.  Lupus ravaged her body, but it couldn't steal her courage, faith or love.   
To the untrained eye, one of these hands may look like it belongs to a frail, elderly person, but that couldn't be further from the truth. This is a picture of me holding a true warrior’s hand. It is the same hand of the strongest person that I have ever known, my mom.

I miss my mother and I grieve my loss, but not for a second do I wish that she were here.  I would never want her to suffer for even another second.  I can only imagine what an incredible Mother’s Day she will be having in Heaven.  
During one of our last conversations, my mom told me that my children would help me get through her death. As always, she was right.

Happy Mother’s Day, Moma! 
Moma and Me


Wednesday, April 30, 2014

State of Total Distraction


On the ride home

Around 9:45 a.m. this morning, I received a call that the peeps were ready to be picked up at the Extension office.  I took a shoebox and a pet carrier to put them in.  When I walked in the office, I just followed the sound to meet AB's peeps. Eighteen.balls.of.fluff.  They are adorable and noisy, but more adorable than noisy.  It really is hard to get anything done, knowing that they are here. I can't wait until AB and LG get home from school.

I did buy a smaller waterer and will feed them in lids for a few days. I also rigged up some chain and snap links so that I can raise and lower the heat lamp.


Tuesday, April 29, 2014

Eve of the Arrival of Baby Chicks

One fateful day, my son, AB, came home from school with a paper from our local 4-H. It was entitled "Chick Chain".   I took a few minutes to read about the program. AB said that he wanted to do it.  On that particular day, our captive animal population included a bearded dragon, two turtles, one dog, and multiple fish.  I regularly care for the CAPs. I really didn't want to triple our CAPs. I want my children to respect all living things, and I want them to be responsible for their CAPs. I have many wants.

We live in a small Southern town, however, we do not live on a farm. I've never raised livestock or flocking animals of any type.

That evening when my spouse arrived home from work, I handed him the aforementioned paper. After quickly scanning the paper, he said, "ok".  Ok, what? No...  The appropriate answer was no.

At one point in the past, I may have wanted to raise chickens and to be earthy and such, but I have come to the realization that I may not have time for that right now.  I may have my kitchen decorated in roosters, but I'm not sure what to do with fowl of the flesh and blood variety.  Ok,so with much hesitation, we are doing this.

We pay the $50 for the program. We attend an orientation. Many weeks go by.

Tomorrow it "C" Day.  Chickies Day.  Eighteen of them to be exact. They are to be picked up in a shoe box at our local Extension office.  Like any expectant mother on the day before her due date, I have the nursery prepared. So, finally, there it is.  The point of this post.  I had to create a brooder for the baby chicks first few weeks of life to keep them safe and warm. This is what I came up with.
I purchased a small roll of hardware cloth. I
used wire cutters to cut the hardware cloth to an
appropriate size for the lid. Then, I used a
permanent marker to mark in the corner
one square over from each edge.
Using a permanent marker and the edge of a square,
I drew lines to each mark I made earlier in the corners.
I gently used a box cutter to go over the lines.  This
was a rather tedious task. I applied gentle pressure
 as I went over it each time. Eventually, I cut through
 the plastic.  As much as I would like to have rushed
through this step, patience paid off.
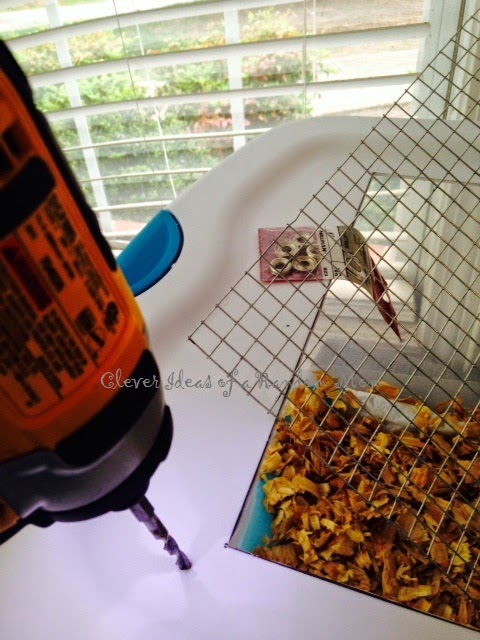
Using the hardware cloth as my guide, I drilled
 holes in the corners and midway on each side.
I used #10-24x3/4 inch machine round combo with nuts and #10 finish washers.

I laid the hardware cloth on top of the lid, aligning the corners
with the holes. Then, I put the bolt through the washer, in the corner
of the hardware cloth, through the hole, and attached the nut on
the underside. I will check the nuts daily and tighten as needed.

Closeup of hardware cloth and bolts
This is the completed setup, ready and waiting for the chickies.  I wanted to try out the bulb, but this is not the actual fixture that we will be using.  I may go with a smaller waterer, but the feed store was out of them.